
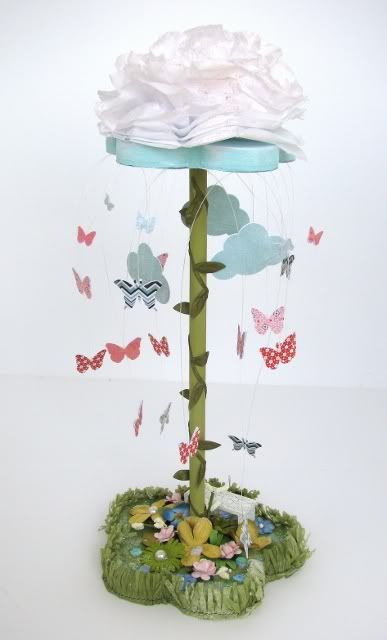
I was sent a pack of the flowers from Wall Sugar to work with this month, Perfect Posies.

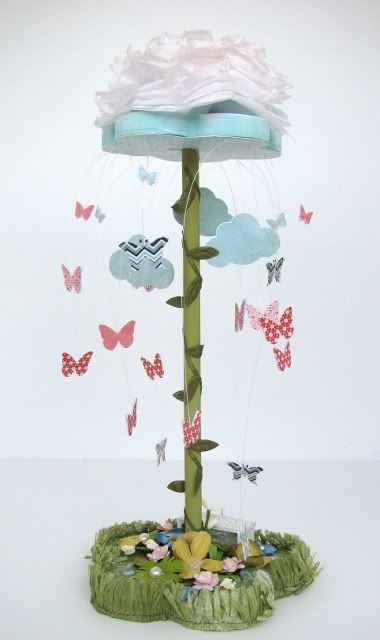
As I turned the flower pieces over in my hands looking for my inspiration I had this wonderful Ah-ha moment and knew exactly what I wanted to create, A Butterfly Dream!
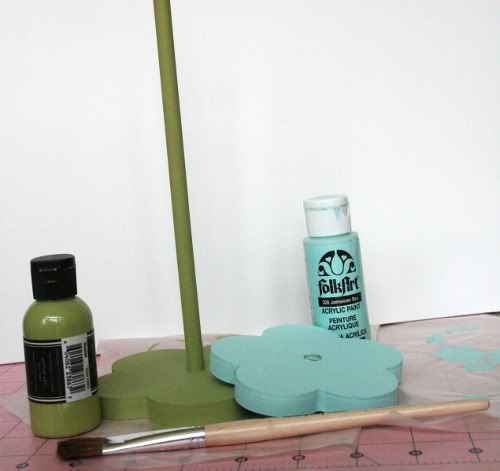
I began by painting my pieces - one for the sky and one for the grass.
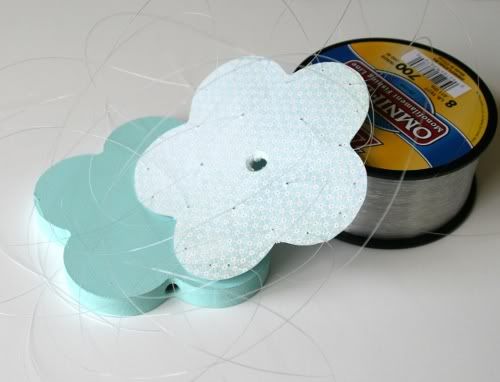
I planned on butterflies dancing from the sky so I poked some holes in a piece of paper that I had cut out and ran fishing wire through them. I was then able to suspend my butterflies from my "sky".
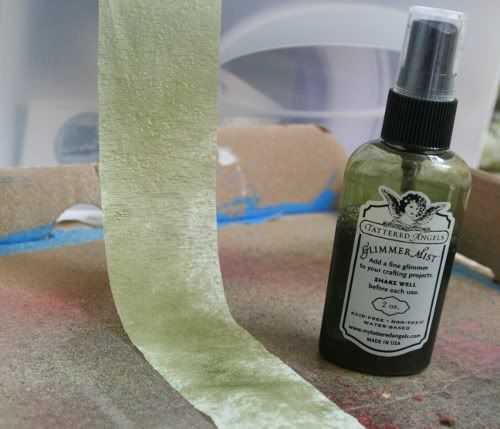
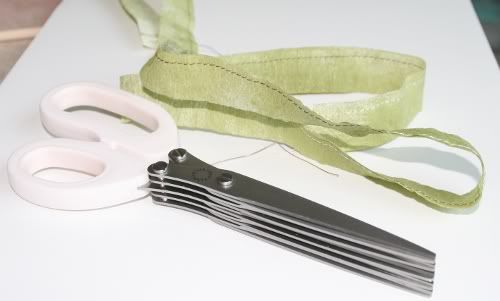
Next came the grass that I envisioned, but how? So I found some white crepe paper in my stash and sprayed it green and let it dry.
I then folded the open edges together on my crepe paper and sewed them. Using my Martha Stewart fringe scissors I then made grass being careful to not cut the part I just sewed together.
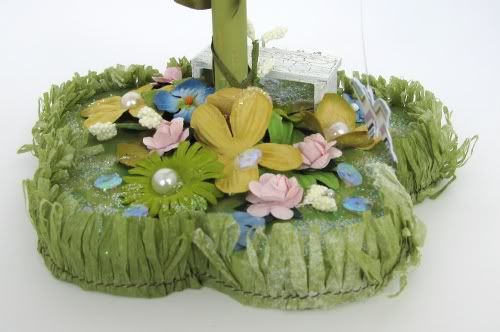
I added some more paint to my green area to shade the bottom, hot glued my grass around my base, I then chose a few Prima flowers that fit the colors I was working with and adhered them to the base. I added pearls, glitter and sequins for a finishing touch. I wrapped some Maya Rd ribbon around my pole.
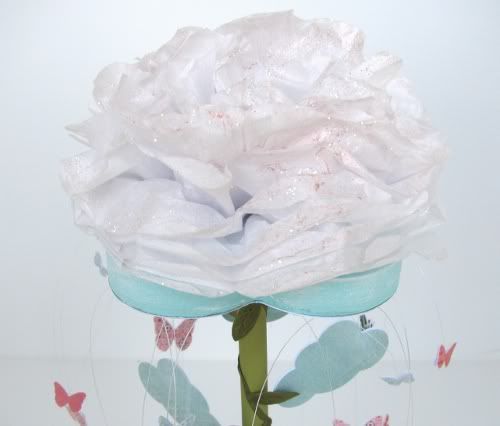
I then made a tissue paper flower/cloud which I misted and sprinkled glitter on.
And finally, here is another look at my finished project...
Thank you all for stopping by I hope you enjoyed this tutorial and try looking at wooden projects in a new way - there are sooooo many possibilities! If you are looking for more ideas check out the Wall Sugar blog this month as the other DT members show their projects and take a look at the class below!
To purchase the Perfect Posies Self paced Class go HERE
To purchase the Wall Sugar wooden flowers used in the class go HERE
After entering your paypal info, enter discount code: posies25
(Discount available online only, not valid at retail locations)
Here's some info about the class:
Do you love flowers but don’t have a green thumb? No worries. You’ve come to the right place. In this class, we’ll use the 3-piece wooden flower set from Wall Sugar to create the perfect posies – no dirt, water or maintenance required!
As the owner of Wall Sugar, I’m excited to share my knowledge of how versatile wood can be. In this class, you’ll learn how to alter and decorate this bare flower set by using multiple techniques, including sanding, heat embossing, painting, paper piecing, working with inks, and fabric manipulation.
I’ll share some great tips on what types of paints, adhesives and other embellishments are great and not-so-great when working with wood. I’ll also show you how to decorate a metal pot with faux grass for your beautiful flowers to rest in. Thus, creating a gorgeous home décor project that can be changed up for any occasion!
You’ll be getting so many ooh’s and ahh’s from family and friends that you’ll want to slap their curious hands away. You’ll also see how incredibly the wooden flowers stand up compared to less sturdy materials such as paper and fabric.
Now THAT is SUPER DUPER creative girl! How adorable.
ReplyDeleteI LOVE it! So creative!!!
ReplyDeleteFabulous project, Wendy!!! I love it!
ReplyDeleteWow LOVE this!! very creative!!
ReplyDelete